
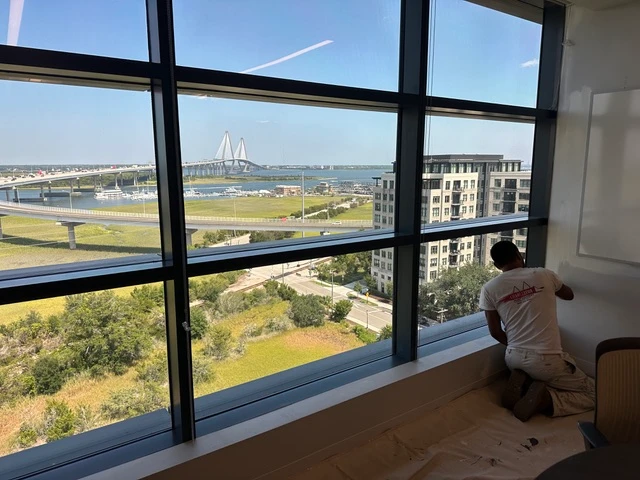
Why Prep Work Matters More Than the Paint Itself
It’s a common assumption that paint quality is the main variable in how a paint job turns out. In reality, even premium paint applied over poorly prepped walls will show every flaw the prep work should have addressed: patched areas that read as a different sheen, dust and debris trapped under the finish, and peeling in spots where old paint wasn’t properly addressed first. Professional-quality results come from professional-quality prep, not just from using better paint.
Step 1: Clear and Protect the Space
Before anything else happens, the room needs to be prepared as a workspace:
- Furniture should be moved to the center of the room and covered, or removed entirely if possible
- Flooring needs protection with drop cloths, ideally canvas rather than plastic, since canvas grips the floor better and reduces slipping and paint bleed-through
- Fixtures and hardware, including outlet covers, light switch plates, curtain rods, and any wall-mounted decor, should come down or be carefully masked
- Doors and windows often need masking around their edges if they’re not being painted the same color as the walls
This stage sounds obvious, but rushed protection here is exactly how paint ends up somewhere it shouldn’t, and how otherwise-good projects end up with avoidable cleanup headaches.
Step 2: Inspect the Walls Closely, in Good Light
Walk the room and actually examine the walls under good lighting, ideally with a work light held at a low angle, which reveals surface imperfections that overhead lighting can hide. You’re looking for:
Nail holes and small dents from picture hangers, shelving, or previous hardware.
Cracks, particularly around door frames, window frames, and ceiling corners, where a home’s natural settling tends to show up first.
Water stains, which can indicate either a past, resolved moisture issue or an ongoing one worth investigating before painting over it. Painting over an active leak or moisture source doesn’t solve the underlying problem, it just hides it temporarily.
Peeling or bubbling in existing paint, which almost always points to an underlying adhesion or moisture problem rather than a purely cosmetic issue that a new coat of paint will simply fix.
Uneven texture or old repairs, which may need to be addressed again if a previous patch job wasn’t done correctly.
Every one of these issues needs to be addressed before painting, not glossed over. Painting over damage doesn’t repair it, and it often makes the eventual real fix more complicated and visible than if it had been addressed properly the first time.
Step 3: Repair Before You Paint
This is where a lot of DIY projects, and honestly some rushed professional jobs too, go wrong: patching gets treated as a quick, optional step rather than something done carefully enough to actually hold up.
Proper drywall repair means more than just filling a hole. It means the patched area is sanded smooth, matched to the surrounding wall’s texture, and properly primed so it doesn’t show through the finish coat as a slightly different sheen, texture, or color, an effect sometimes called “flashing” that’s especially noticeable under certain lighting conditions, particularly with satin or semi-gloss finishes.
Common repairs at this stage include:
- Filling and sanding nail holes and small dents
- Repairing larger holes or damaged sections of drywall
- Addressing cracks, which sometimes require flexible caulk or mesh tape depending on the cause and size
- Fixing peeling or bubbled paint by scraping back to a sound surface before patching and priming
If you’re dealing with old wallpaper rather than bare painted drywall, that’s an entirely separate prep challenge with its own risks. Wallpaper removal done incorrectly, rushing the process or using the wrong technique for the adhesive type, can seriously damage the wall surface underneath, which then requires its own repair before painting can even begin. This is one of the more common ways a seemingly simple room refresh turns into a bigger project than expected.
Step 4: Clean the Surfaces Thoroughly
Dust, grease (especially in kitchens and near light switches that get touched often), and general accumulated grime all interfere with proper paint adhesion. A simple wipe-down with a mild cleaner or diluted TSP substitute, followed by adequate drying time before any further work, makes a genuine difference in how well paint bonds to the wall over the long term.
This step is easy to skip because its absence isn’t immediately visible the way an unpatched hole is. But poor adhesion from skipped cleaning tends to show up months later as peeling or premature wear in high-touch areas.
Step 5: Sand and Prime Where Needed
Glossy existing paint needs a light scuff-sanding so new paint has something to grip onto, since new paint applied directly over a high-gloss surface without this step is prone to peeling.
Repaired patches almost always need their own primer coat, since drywall compound absorbs paint differently than the surrounding painted surface, and skipping primer here is one of the most common causes of visible patch marks after painting.
Bare drywall, whether from a repair or new construction, needs primer to seal the surface and ensure even color absorption.
Major color changes, particularly going from a dark existing color to a much lighter one, or vice versa, often benefit from a tinted primer to reduce the number of finish coats needed for full, even coverage.
Primer isn’t an upsell or an unnecessary extra step. It genuinely improves how evenly color goes on, how well it adheres over time, and how much finish paint is ultimately needed to achieve full coverage.
Step 6: Tape and Mask the Details Carefully
Clean, crisp lines around trim, ceilings, and adjacent walls of a different color come from careful, patient masking, not simply a steady hand with a brush. This step matters most, and is most visible when done poorly, around trim and molding and ceiling edges, where a crisp, straight line makes the single biggest visible difference in how finished and professional a room ultimately looks.
Quality painter’s tape, properly pressed down to prevent bleed-through, and removed at the right time (typically before the paint fully cures, following the specific product’s guidance) both matter for a clean final result.
Prep Considerations by Room Type
Different rooms carry slightly different prep priorities worth knowing about:
Bathrooms deal with significant humidity, which makes proper cleaning to remove any mildew, along with a moisture-resistant primer, particularly important. See our bathroom painting page for more on this.
Kitchens accumulate grease near cooking areas that requires more thorough degreasing than a typical living space. Our kitchen painting page covers the specifics.
Living rooms and bedrooms generally have more straightforward prep needs but often involve more furniture and decor to work around, along with a greater likelihood of nail holes from wall art and shelving. Our living room and bedroom pages go into more detail on what each space typically involves.
Prep Matters Just as Much on Exterior Projects
Everything covered here applies to exterior painting projects too, just with each step’s outdoor equivalent: pressure washing instead of dusting and wiping, scraping and sanding failing paint instead of patching drywall, and checking for wood rot or moisture intrusion instead of interior water stains. We cover the exterior side of this process in more detail in our guide on preparing your home for exterior painting.
Tools and Materials a Proper Prep Job Typically Requires
Understanding what a thorough prep job actually involves in terms of materials helps set expectations, whether you’re doing it yourself or evaluating a professional’s process:
- Drop cloths, ideally canvas, for floor and furniture protection
- Spackle or joint compound, for filling nail holes, dents, and small cracks
- Sandpaper in multiple grits, for smoothing patches and scuffing glossy surfaces
- A quality primer, appropriate to the surface (drywall, previously painted, bare wood, etc.)
- Painter’s tape, for masking trim, ceilings, and adjacent surfaces
- A mild cleaner or degreaser, for wall washing before painting
- A putty knife or drywall knife, for applying and smoothing patching compound
- A shop vacuum or tack cloth, for removing sanding dust before priming
Skimping on any of these, particularly using low-quality tape or skipping proper sanding tools, tends to show up directly in the final result.
Common Prep Mistakes and How to Avoid Them
Painting over dust. Sanding always creates fine dust, and painting over it without proper cleanup leads to a gritty, uneven finish. A thorough wipe-down or vacuum pass after sanding is a small step that makes a real difference.
Using the wrong caulk for cracks. Not all cracks call for the same repair approach. Small, stable hairline cracks often just need spackle, while cracks along moving joints (where drywall meets trim, for instance) may need a flexible caulk instead, since rigid spackle can crack again at these movement points.
Removing painter’s tape at the wrong time. Tape removed too late, after the paint has fully cured, can pull off some of the finish along with it. Tape removed too early, before the paint has set at all, can smear. Following the specific paint product’s guidance on timing matters more than most people realize.
Underestimating dry time in humid conditions. Charleston’s ambient humidity extends dry times for patching compound, primer, and paint alike compared to a drier climate. Rushing through steps on a compressed timeline is a common cause of adhesion problems and visible flaws.
Not testing paint color in the actual room. Lighting varies enormously between a paint store, a phone screen, and your actual room at different times of day. Testing a sample patch directly on your wall, viewed at different times of day, avoids an unpleasant surprise after a full room is painted.
A Realistic Prep Timeline
For a single average-sized room with only minor repairs needed (a few nail holes, no significant damage), prep work including cleaning, patching, drying time, sanding, and priming often takes a full day or more before any finish paint is even applied, when done properly. Rooms requiring more extensive repair, drywall patching, wallpaper removal, or significant surface issues, naturally take longer. This is worth keeping in mind when planning a project timeline, since prep is frequently the least visually exciting but most time-consuming part of a quality paint job.
Prep Considerations for Ceilings Specifically
Ceilings carry their own specific prep considerations worth calling out separately from walls. Ceiling painting often involves addressing water stains from past or resolved roof or plumbing issues, which typically need a stain-blocking primer to prevent the discoloration from bleeding back through new paint. Textured ceilings, including popcorn-style texture common in many homes, require particular care during cleaning and prep to avoid damaging the texture, and any texture repair needed should be addressed and fully dried before painting begins.
Frequently Asked Questions
Q: Do I really need to prime before painting if I’m using the same color?
A: Not always, if the existing surface is in good condition and you’re applying a similar color with no repairs involved. But any patched area, color change, or previously glossy surface generally benefits from priming regardless of the final color.
Q: How long should I wait after patching drywall before painting?
A: This depends on the specific joint compound or patching product used, but most require at least 24 hours to fully dry before sanding and priming, sometimes longer for larger repairs or in more humid conditions.
Q: Can I paint over wallpaper instead of removing it?
A: It’s technically possible in limited circumstances with the right specialty primer, but it’s generally not recommended, since wallpaper seams, texture, and adhesive can all telegraph through the paint and cause longer-term adhesion problems. Proper removal, while more work upfront, produces a far more reliable long-term result.
Q: What’s the biggest prep mistake people make?
A: Rushing the drying time between steps, particularly after cleaning, patching, or priming. Painting over a surface that isn’t fully dry is one of the most common causes of adhesion failure and visible flaws in the finished product.
Q: Should I sand between primer and paint coats?
A: A light sanding between primer and the first finish coat, particularly over patched areas, often produces a smoother, more professional final result, though it’s not always strictly necessary depending on the primer product used.
Q: How do I know if a water stain on my ceiling is safe to paint over?
A: A stain from a past, fully resolved issue (an old roof leak that’s since been repaired, for example) is generally safe to prime over with a stain-blocking primer and paint. An active or recurring stain indicates an ongoing moisture source that should be identified and fixed before any painting, since painting over an active leak only delays a more serious problem.
Q: Is it necessary to remove switch plates and outlet covers, or can I just tape around them?
A: Removing them entirely, when practical, gives a cleaner result than taping around them, since paint can bleed under tape edges over time and outlet covers removed and reinstalled after painting look more finished than ones with visible paint lines around their edges.
How Prep Requirements Differ for New Construction vs. Older Homes
Not every prep job starts from the same baseline. New construction and older, previously painted homes call for meaningfully different approaches.
New construction typically involves fresh drywall that has never been painted. This means the primary prep concerns are ensuring joint compound is fully cured and sanded smooth, and applying a proper drywall primer that seals the porous new surface evenly, since unprimed new drywall absorbs paint unevenly and can result in a blotchy, inconsistent finish, sometimes called “flashing,” particularly noticeable at taped seams.
Older homes with existing paint carry a different set of considerations. Multiple layers of old paint can affect how new paint adheres, particularly if any older layers are oil-based and a water-based product is being applied over them, which requires a specific bonding primer to ensure proper adhesion. Homes built before 1978 also warrant a specific consideration: lead-based paint. If a home’s paint predates that year and hasn’t been tested, professional lead-safe practices may be required during prep work, particularly if sanding or scraping is involved, since these activities can disturb lead-containing paint dust.
Homes with visible past repairs sometimes have inconsistent wall texture or sheen from previous patch jobs that weren’t fully blended in. Addressing this properly as part of a new prep process, rather than simply painting over the inconsistency again, produces a meaningfully better final result.
When to Bring in a Professional
Prep work is genuinely time-consuming, and it’s the stage most DIY projects underestimate both in terms of time and skill required to get right. If a room has significant damage, old wallpaper, or you’re simply short on time, a professional crew can handle the entire process, from initial inspection through patching, priming, and final paint, so nothing gets skipped or rushed along the way.
Whether it’s one room or a full interior repaint, our team handles every stage of prep properly before a single coat of color goes on.
Ready to get a room done right, from prep to finish? Request a free estimate today.
